
Exploring the Alumio navbar
Located at the top of the Alumio dashboard, the navbar is your central menu for navigating all the tools and features of your Alumio integration environment. It’s designed to provide immediate access to every major feature of Alumio, ensuring that you can quickly move between building, automating, transforming, and orchestrating your integrations. Ready to get a brief introduction to all the capabilities of Alumio?
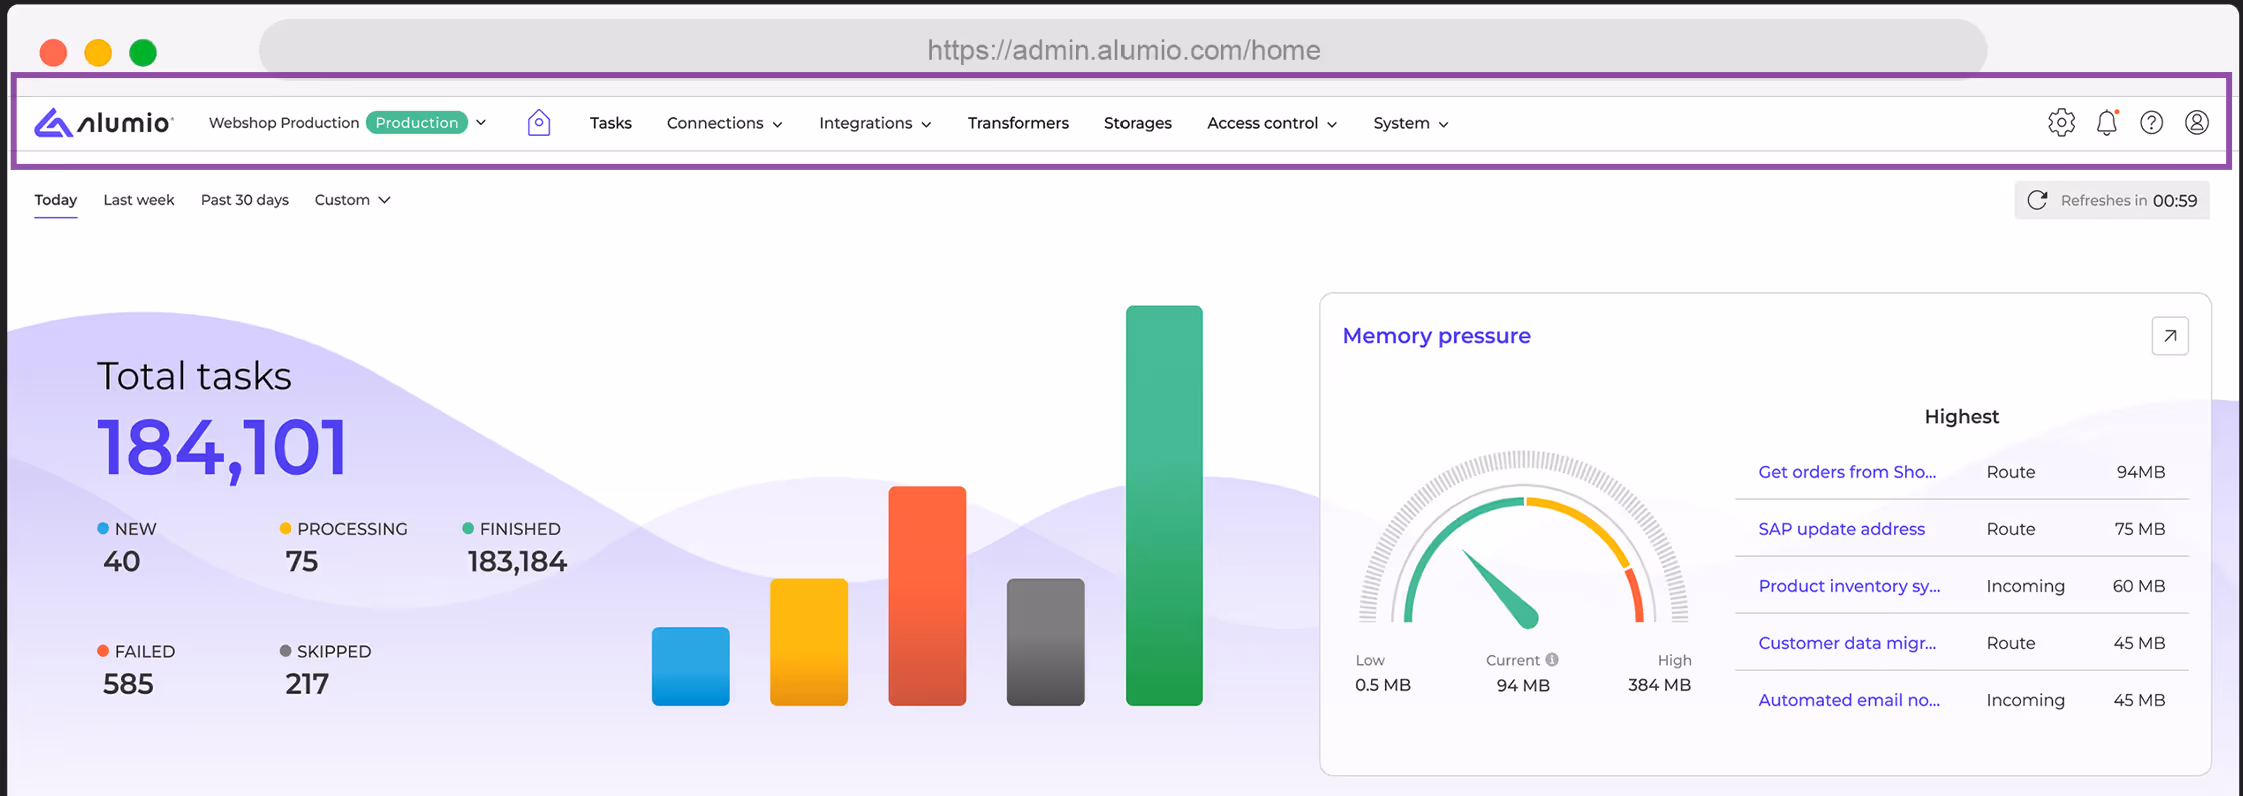
Here’s a detailed look at what each section of the navbar offers (from the top left):
- Alumio logo and home button:
Clicking the Alumio logo or the Home button always takes you back to the Dashboard. As explored above, this is your comprehensive overview of system health, active Tasks, running Routes, and other key metrics, making it the starting point for your daily monitoring. - Environment indicator:
Prominently displayed is the environment indicator, which shows whether you are currently operating in a "Production Environment" or a UAT (User Acceptance and Testing) environment. This quick visual cue helps prevent accidental changes in the wrong environment.
A UAT environment, also known as a demo, sandbox, or development environment, can be used to test your integrations and to experiment with modifications and changes. On the other hand, a production environment will be your live environment, connected to live systems, and all changes in this environment will directly reflect in integrations that are currently running live with real-world implications. - Main navigation items:
The navbar organizes Alumio’s functionality into clear categories, each with its own set of sub-items:- Tasks:
This provides direct access to your Task overview, where you can search and filter all your integration Tasks as per their status. You can also search them by the Routes that are generating them, the date they were created or updated on, their identifiers, and entity schema. - Connection methods:
This menu groups various key connection types that the Alumio integration platform provides to facilitate data exchange. It includes:
- HTTP (API): Enabling integration with remote web services using HTTP clients to read and write data. Supporting authentication methods like Basic, OAuth 2, and Bearer Token for secure access.
- Database: Connecting to popular databases like MS SQL, MySQL, PostgreSQL, and Oracle using database clients, simplifying incoming and outgoing data configurations.
- SOAP: Connecting to SOAP-based web services using WSDL files or manual configurations, enabling data exchange with systems that rely on XML-based communication. Supports authentication, response validation, and multiple request handling.
- HTTP Proxies: Enabling external applications to request real-time data from other systems via Alumio by creating an API endpoint for seamless connectivity and secure data exchange.
- Webhooks: Facilitates event-driven, real-time data pushes from external systems to instantly trigger processes. It enables external applications to send real-time data to Alumio by creating an API endpoint for seamless data exchange and processing.
- Filesystems: A filesystem represents a (remote) environment that is used to host files. The most common example of a filesystem would be an FTP directory.
- HTTP Authentications: Secures API communications by managing authentication credentials and protocols efficiently. They support various authentication methods, such as Basic Authentication, Bearer Tokens, and API Keys.
- Integration components:
As mentioned at the start of the course, the Alumio iPaaS enables integrations via Routes, which allow you to import, export, schedule, and transform data. This section in the navbar provides an overview of these key integration components:
- Routes: This is the starting point of building an integration, representing the bridge through which data flows between two endpoints. Clicking on it opens an interface to connect your Incoming and Outgoing configurations, apply data transformations, set Schedulers, and run the overall integration to ensure data moves through the integration pipeline as intended.
- Incoming: This is where you configure which endpoint you want to retrieve data from. This could include APIs, (S)FTP directories, databases, or other systems. It enables precise control over data fetching, including request encoding, data transformation, and pagination handling. Incoming configurations are reusable across multiple Routes, ensuring efficiency by retrieving data once and distributing it where needed.
- Outgoing: This is where you configure which endpoint you wish to send data to and define how you wish to send that data from Alumio. This also includes APIs, (S)FTP directories, databases, or other systems. It enables precise control over data publishing, including request encoding, data transformation, and handling of structured payloads. Outgoing configurations can also be reused across multiple Routes.
- Schedulers: The Scheduler allows you to intelligently schedule each part of your integration. It automates the execution of Incoming and Outgoing configurations based on a custom schedule, ensuring seamless data processing. You can configure cron-based execution, set task limits to prevent API overload, and set priorities to control job execution order. The Scheduler also includes an AI Scheduler Generator that helps you set up automated schedules for running integrations by generating the correct time-based trigger (cron job) based on your input.
- Transformers: Alumio provides a range of Transformers that help you modify, map, filter, and enrich data to ensure it meets the requirements of both source and target systems. They can be used to rename fields, filter specific data, enrich records, and apply conditional logic. Used in Incoming Configurations, Transformers can clean and format data before retrieval; in Outgoing Configurations, they can optimize data before sending (e.g., preventing duplicates); and in Routes, they can refine data in transit (e.g., filtering data). By applying Transformers effectively, you can limitlessly customize your integrations.
- Storages: Storages in Alumio manage where and how integration data is temporarily held or archived. They allow you to store, filter, and manage entities within your integrations, ensuring data is accessible when needed. Storages help streamline data handling by supporting version control, logging, and automated data pruning. Whether used for temporary data storage or archiving, they ensure that integration data remains structured, accessible, and efficiently managed within Alumio. The Storages overview page provides a centralized view of all created Storages, enabling you to filter, export, empty, delete, or create new ones.
- Access Control: Access Control in Alumio manages user permissions, authentication, and system activity tracking, ensuring secure access to your integration environment. It includes three key components:
- Users: Manage access rights by assigning roles, where Administrators have full control, Editors can configure but not manage users, and Viewers can only view and run processes.
- API Keys: Generate unique authentication tokens for secure API communication with Alumio. API keys serve as Bearer tokens in the Authorization header.
- Audit Trail: Track system activity with a detailed log of actions performed by users, including timestamps, responsible users, and affected configurations. Filters allow easy tracking of specific events.
- System: The System section in Alumio provides essential tools for managing data structures, system processes, logs, and environment settings. It includes the following components:
- Entity Schemas: Define the structure, validation rules, and identifiable fields of data flowing through your integrations. Alumio provides a set of standard schemas while allowing you to create custom ones.
- Environment Variables: Securely store sensitive data like passwords and API keys, ensuring they remain encrypted and inaccessible within configurations.
- Queue: Monitor, manage, and prioritize scheduled Tasks to ensure processes run efficiently. Use the Queue page to track how long processes take from scheduling to completion, helping optimize intervals and prevent system strain. Identify unprocessed queues or failures and take corrective actions as needed.
- Logs: Track system activity with detailed logs of background processes, including task pruning, notifications, and statistics generation. Logs can be viewed, filtered, exported, or copied.
- Import/Export: Easily transfer configurations such as Routes, Transformers, Schedulers, and more, allowing seamless migration or backup of integration setup.
- Environment Details: View key environment settings, including Alumio and Dashboard versions, additional packages, API endpoints, license type, and SLA statistics.
- Notifications:
All system notifications and alerts are centralized here, ensuring you never miss critical updates or error messages. - Help:
This section is designed to support you with resources including:
- Create Ticket: Quickly raise a support request.
- Forum: Access documentation and community discussions.
- Release notes: Stay updated on the latest Alumio enhancements.
- Getting started: Watch tutorial videos and read guides to help you master the platform.
- User Profile:
In this area, you can switch between environments, adjust user preferences (such as cookie settings and dashboard configurations), and log out securely.
- Tasks:
Conclusion
The Alumio dashboard and navbar are more than just a control panel—they are the command center of your integration ecosystem. Every metric, graph, and navigation item is designed to give you real-time awareness and control over how your data moves across applications and data sources.By navigating its key elements, understanding its monitoring tools, and leveraging its powerful integration capabilities, you’re learning how to govern and orchestrate Alumio as the digital backbone of your business automation.
Understanding how to navigate the dashboard equips you with three powerful abilities:
- Clarity: you can see, at a glance, whether integrations are succeeding or failing, and why.
- Control: you can intervene at the right moment, fine-tuning Routes and troubleshooting Tasks.
- Confidence: you can trust that your integrations are running smoothly, freeing your team to focus on growth instead of firefighting.
Whether it's tracking Tasks, optimizing Routes, or troubleshooting in real time, the dashboard provides the visibility and flexibility needed to streamline your integration processes. As such, this course is designed to give you an overview of all these components of Alumio to familiarize you with the structure and processes through which the platform helps build, automate, transform, and orchestrate integrations.
But understanding the dashboard is just the first step. Now that you know how your Alumio integration environment actually works, it's time to deep dive into how Alumio helps you build integrations. In the next courses, you’ll explore how integration Tasks help execute scheduled jobs and track integrations at every step of the way. Then, we'll get into building Routes, which act as the essential blueprint and pathways that guide your data from one system to another.
Each step will bring you closer to mastering Alumio’s full potential—enabling you to build your first integration, automate processes across multiple endpoints, transform data with great flexibility to meet evolving business needs, and ultimately manage a seamlessly connected data ecosystem.
.svg)
.svg)
.svg)
.svg)
.svg)
.svg)